
The guide we send dentists.
The same instructions that go out with a new portal invitation, in twenty pages — sign in, start an order, choose the design, attach the scan, confirm and place it. Every picture is a real screen from the portal.
Ordering
on the Dentaltec
portal
A step-by-step guide for dentists. Ten screens, about three minutes — turn the pages with the arrows, the contents list, or your keyboard.
What the portal does
One place for cases, progress and billing — instead of prescription forms, couriers and phone calls.
- Send a case in minutes. Attach scans, photos and your prescription; no courier paperwork.
- See where every case is. Track it from receipt through to dispatch without calling us.
- Keep the account up to date. Invoices, statements and order history in one place.
- Your trade rates, applied automatically. The rates on your account are the rates on the order.
Have these ready
None of it is complicated. Having it open before you begin is what makes the order take three minutes.
- Your clinic email — the address we write to about your cases.
- The patient's name, or a reference if you prefer not to use it.
- The tooth numbers and the design you want.
- Your scan — STL, PLY, OBJ, DICOM or a ZIP. If you are sending impressions instead, choose that and we collect them.
- 1Patient & shade
- 2Prescription
- 3Preferences
- 4Scans & records
- 5Delivery
- 6Review & confirm
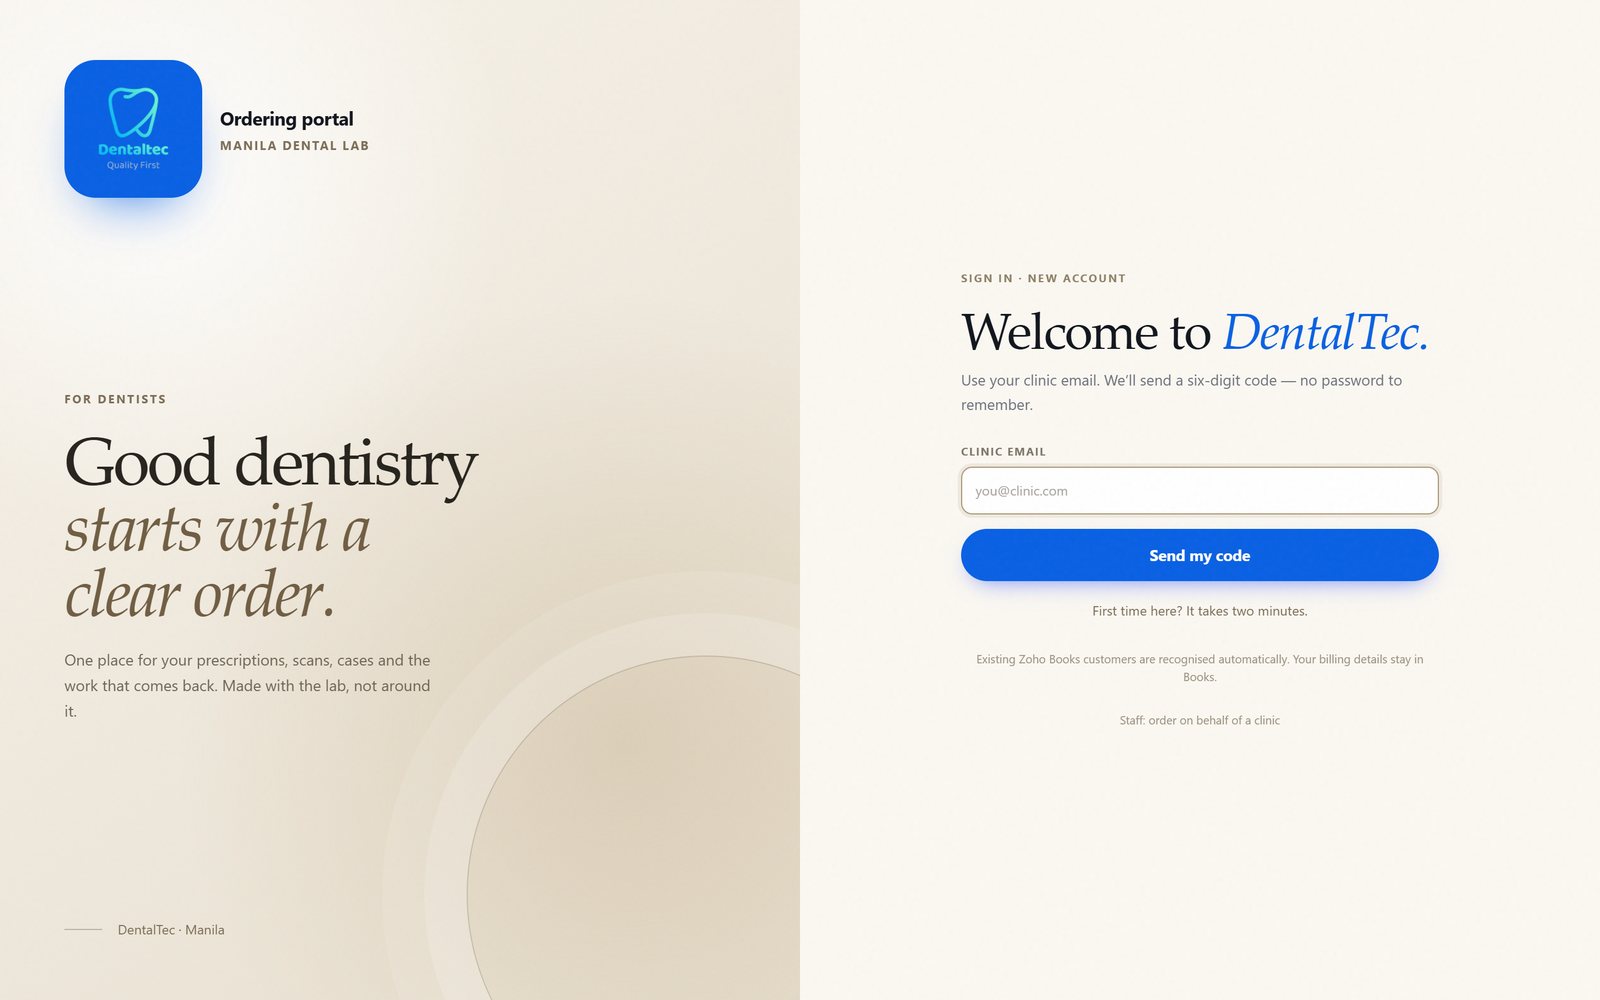
Sign in
No password. We email you a six-digit code each time — safer, and nothing to forget.
- Open orders.dentaltec-asia.com in any browser.
- Type your clinic email and press Send my code.
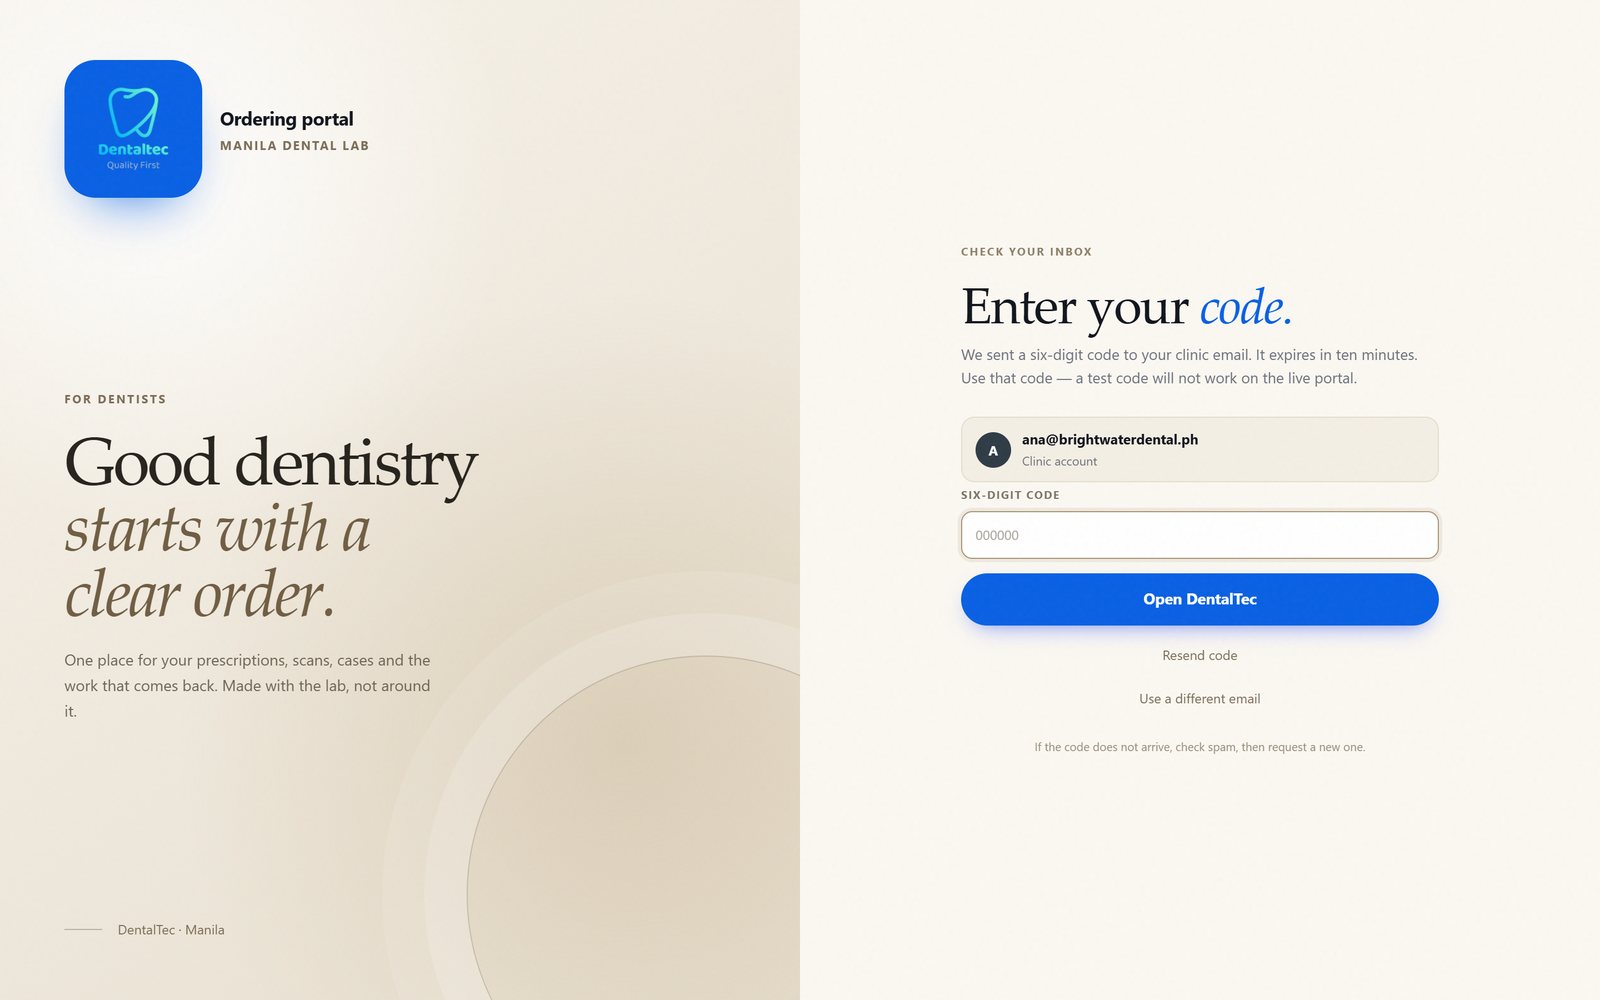
- Open your inbox, type the six numbers, press Open Dentaltec.
The six-digit code
The code arrives within a minute and stays valid for ten.
- Copy the six digits from the email.
- Type them in, then press Open Dentaltec.
- Nothing yet? Check spam, then press Resend code.
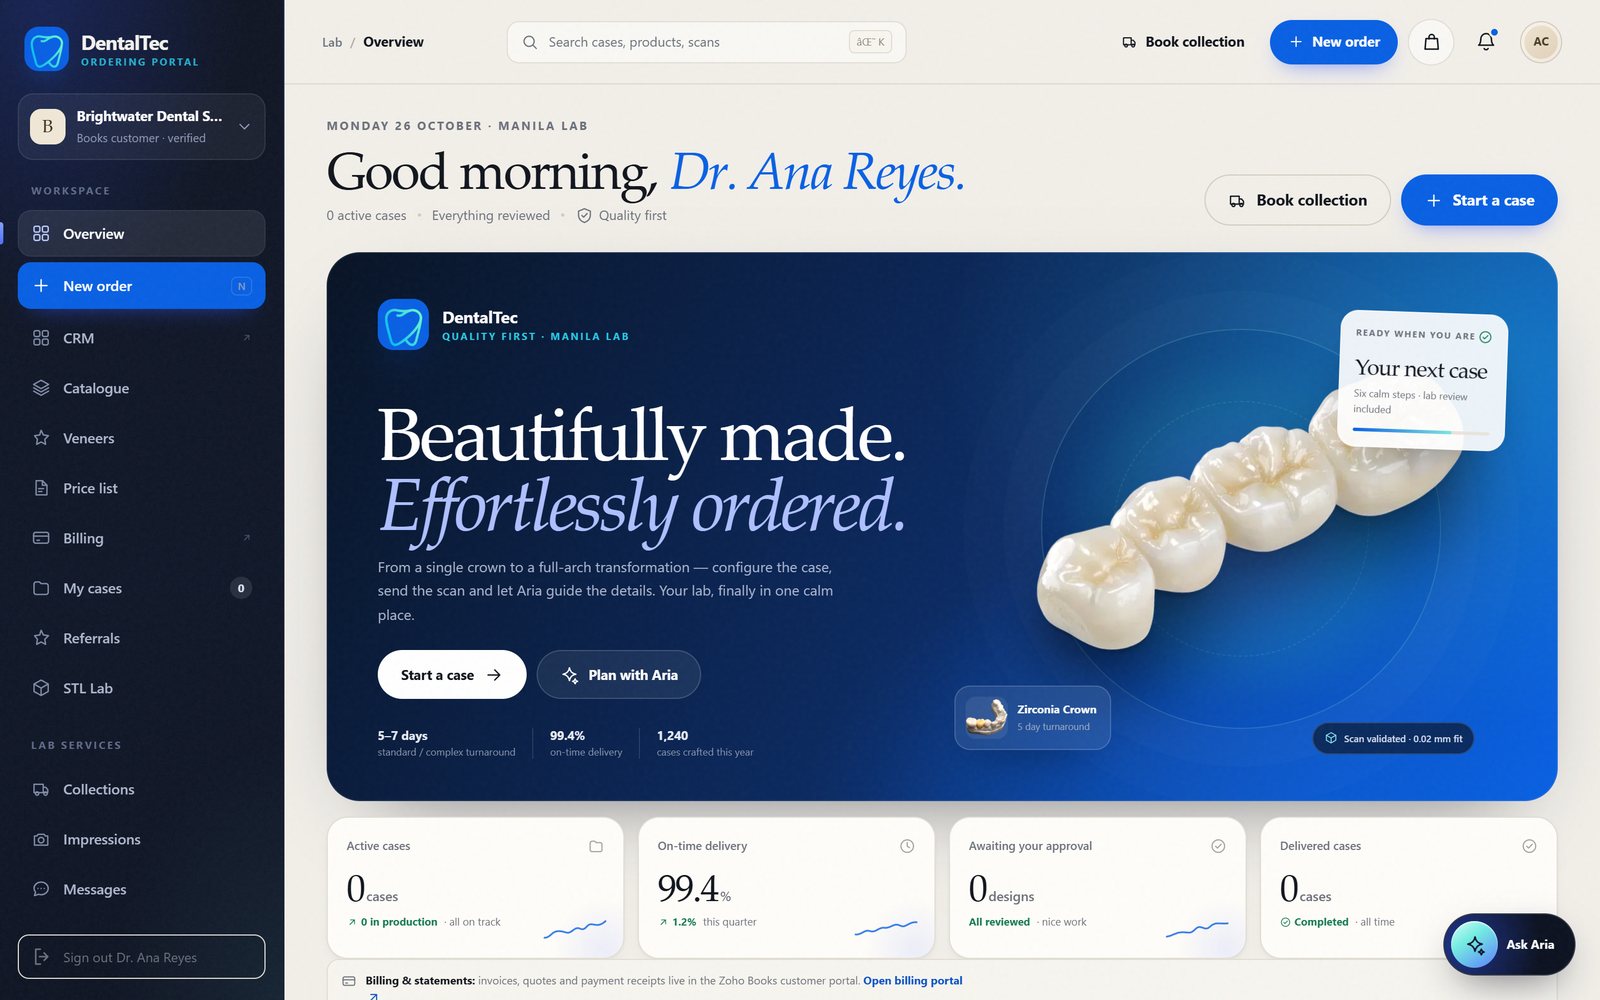
Your home screen
This is where you land after signing in. The menu on the left is the whole portal.
- Overview — your home page and the blue Start a case button.
- Catalogue — browse every treatment before you start.
- My cases, Messages, STL Lab — your work, conversations and scans.
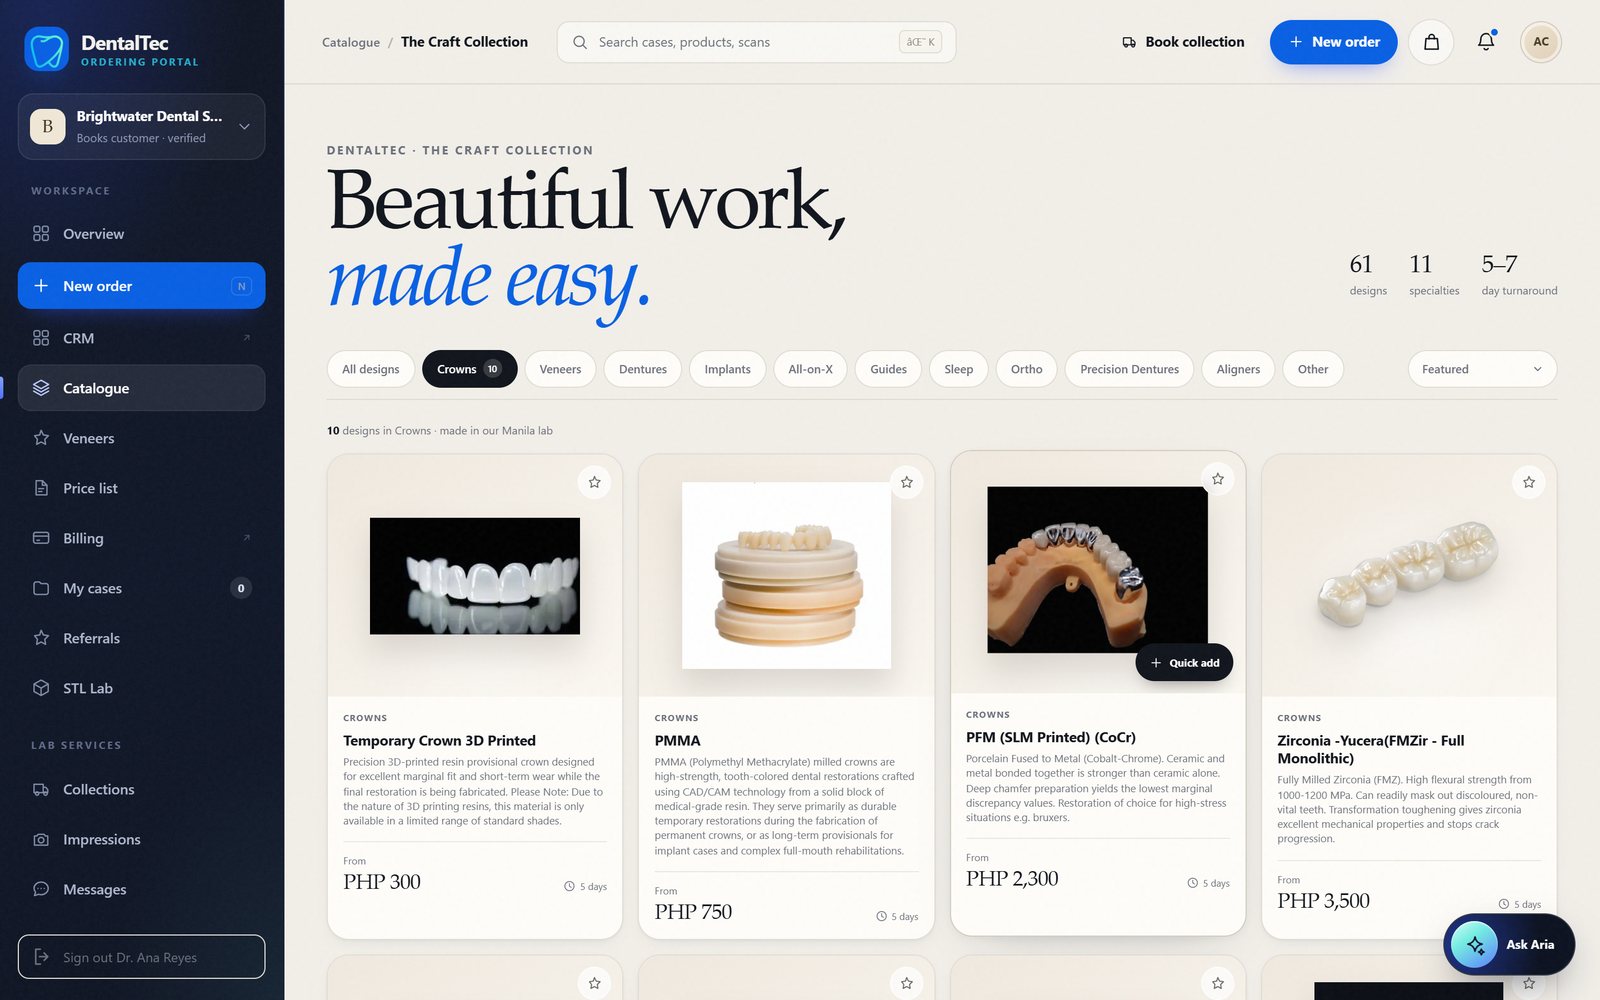
Start an order
Two ways in. Both lead to the same six-step order.
- Quick way: press New order, then choose your design inside the order.
- Browse first: open Catalogue, look through a treatment, press Quick add.
- Then press New order to begin the guided order.
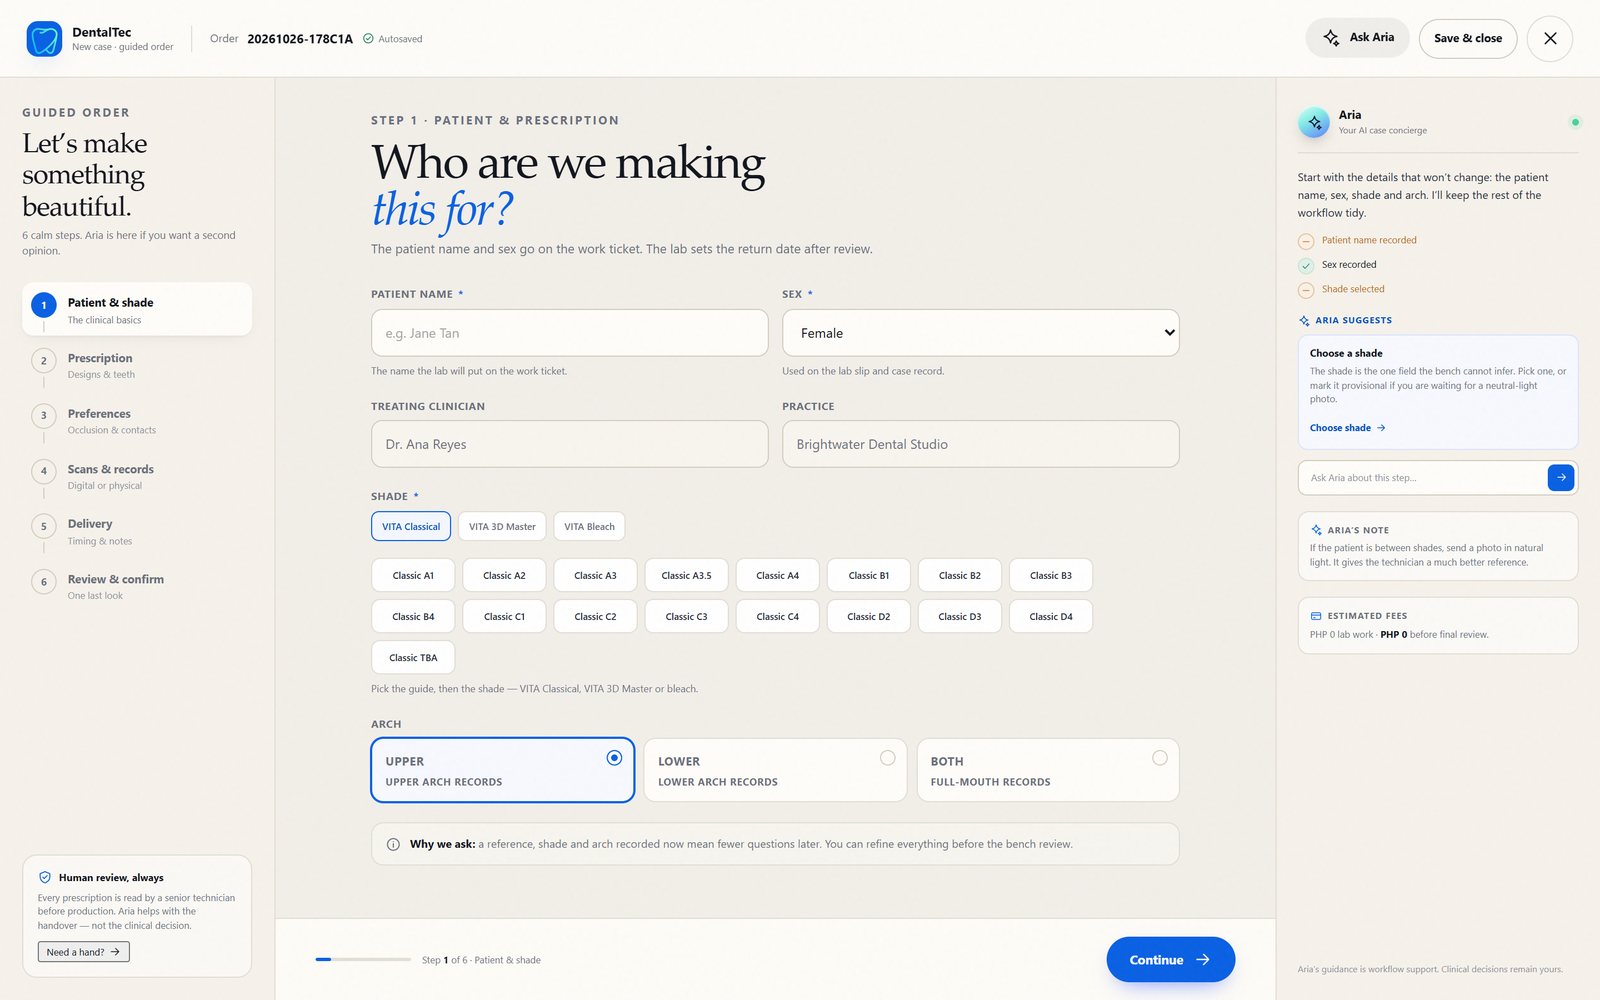
Patient and shade
The order opens at step 1 of 6. If you are ever lost, the left column shows all six steps.
- Type the patient's name and choose sex.
- Pick the shade guide, then the shade.
- Choose the arch: upper, lower, or both. Then press Continue.
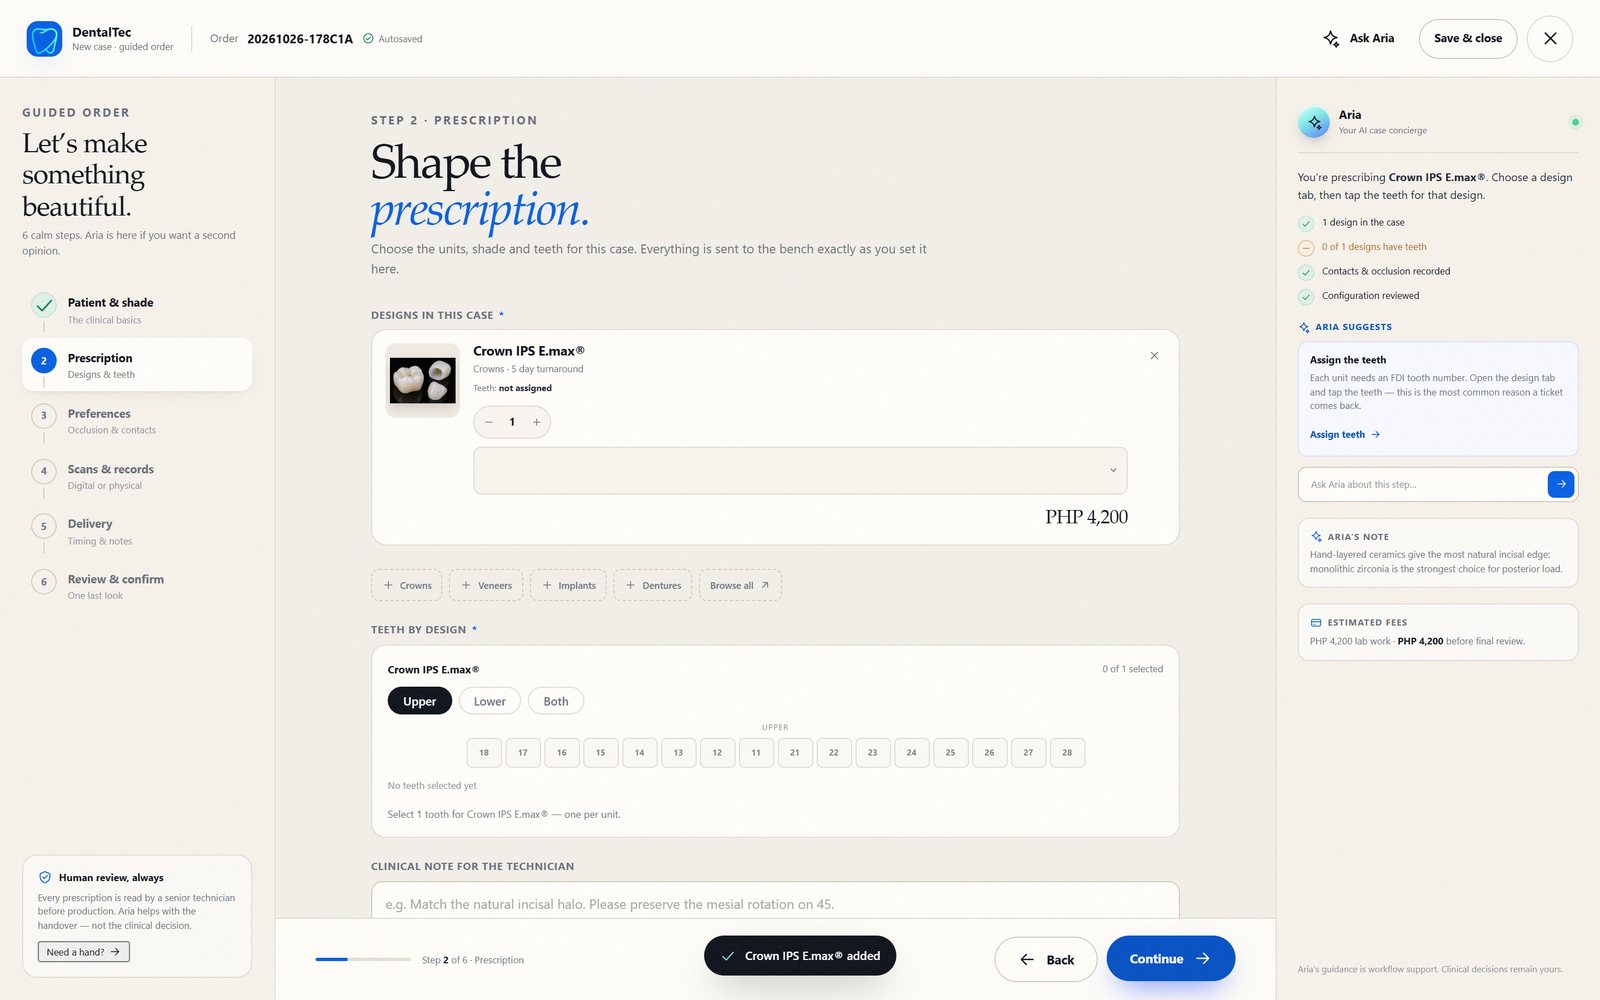
What are we making?
Choose the work, then click the teeth on the chart.
- Pick a treatment type across the top.
- Click the design you want — the lab fee is on the card.
- Click each tooth you are restoring, then press Continue.
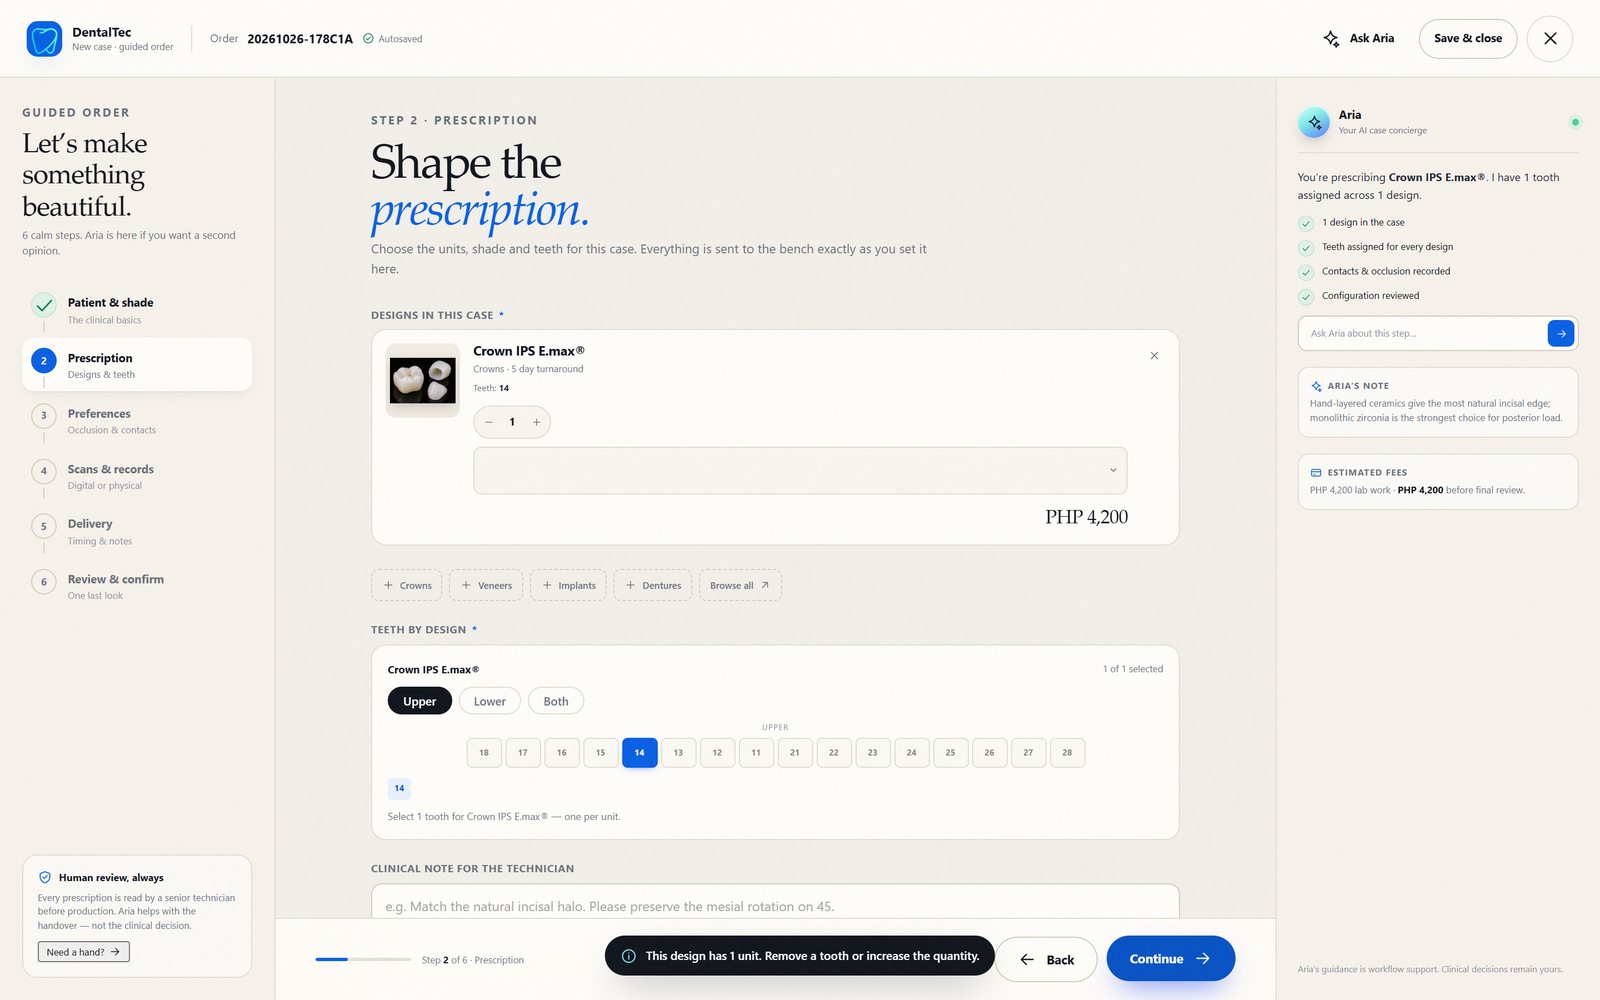
The teeth
Each tooth you click turns blue, and the fee adds up underneath.
- Click a tooth to select it; click again to remove it.
- Several restorations? Add another design before you continue.
- The order total updates as you go.
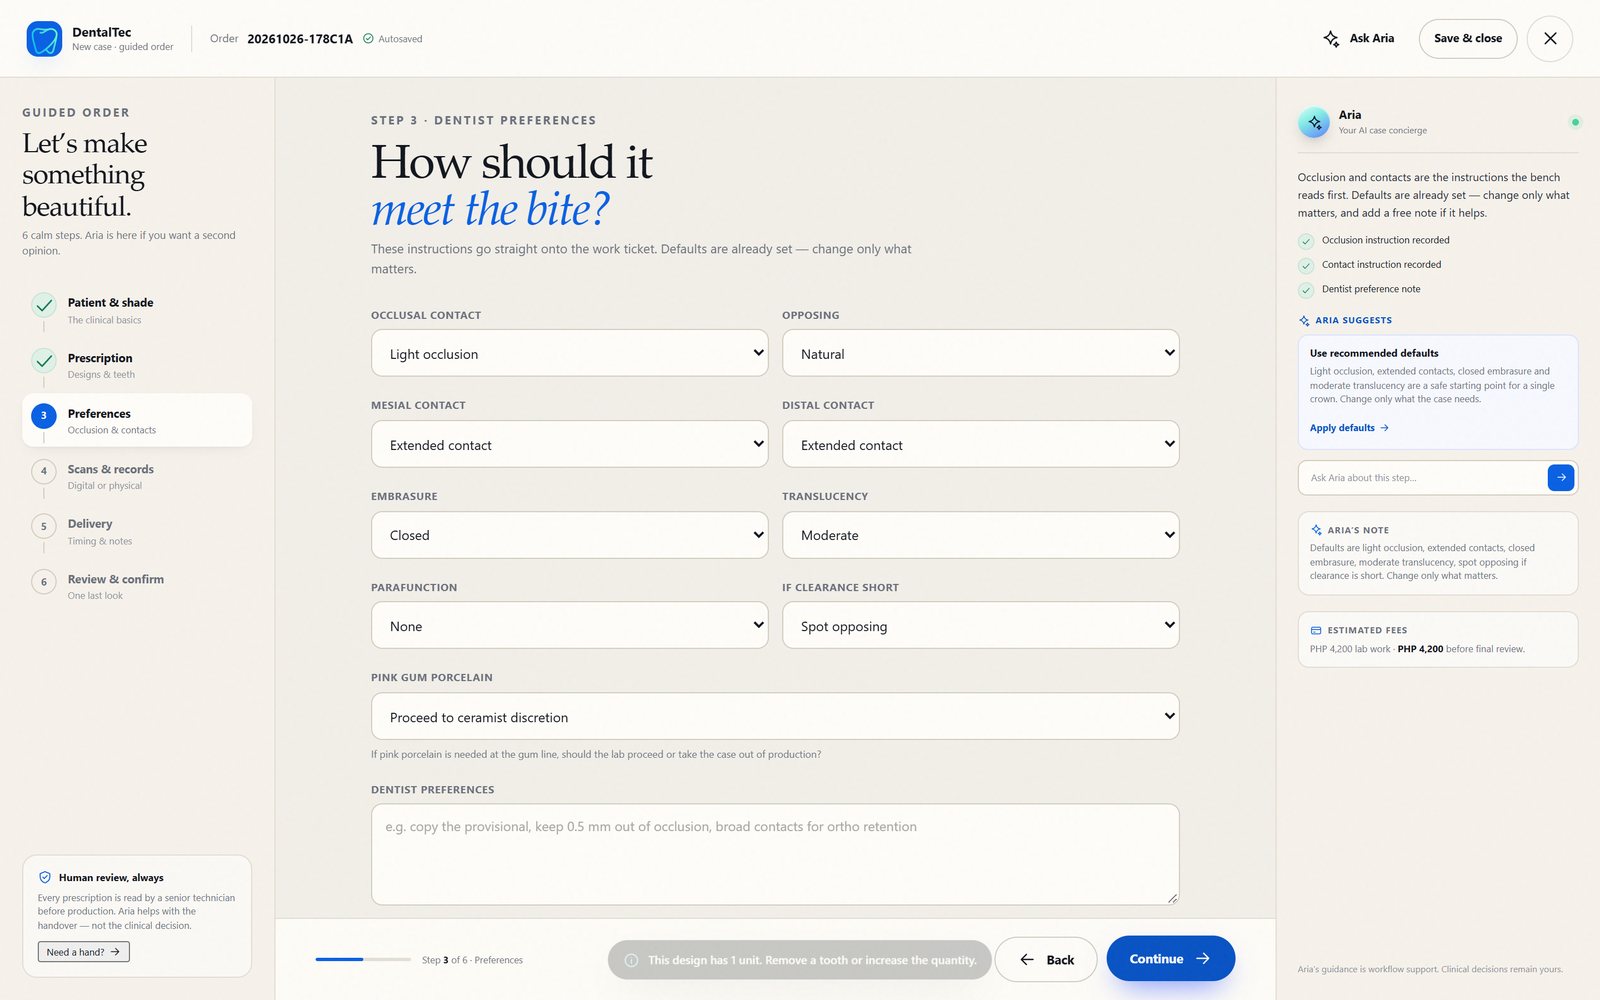
Preferences
Occlusion, contacts, embrasure and translucency, set to our recommended defaults.
- Read down the list — most cases need no changes at all.
- Change only what matters for this patient: tight contacts, a deep bite, translucency.
- Press Continue.
Scan and records
This is where the case starts to move. A clean scan keeps it moving.
- Choose Digital scan if you have a file, or Physical impressions for a collection.
- Drag your file into the box, or press it and choose the file.
- No file that small? Paste a Drive, WeTransfer or Dropbox link.
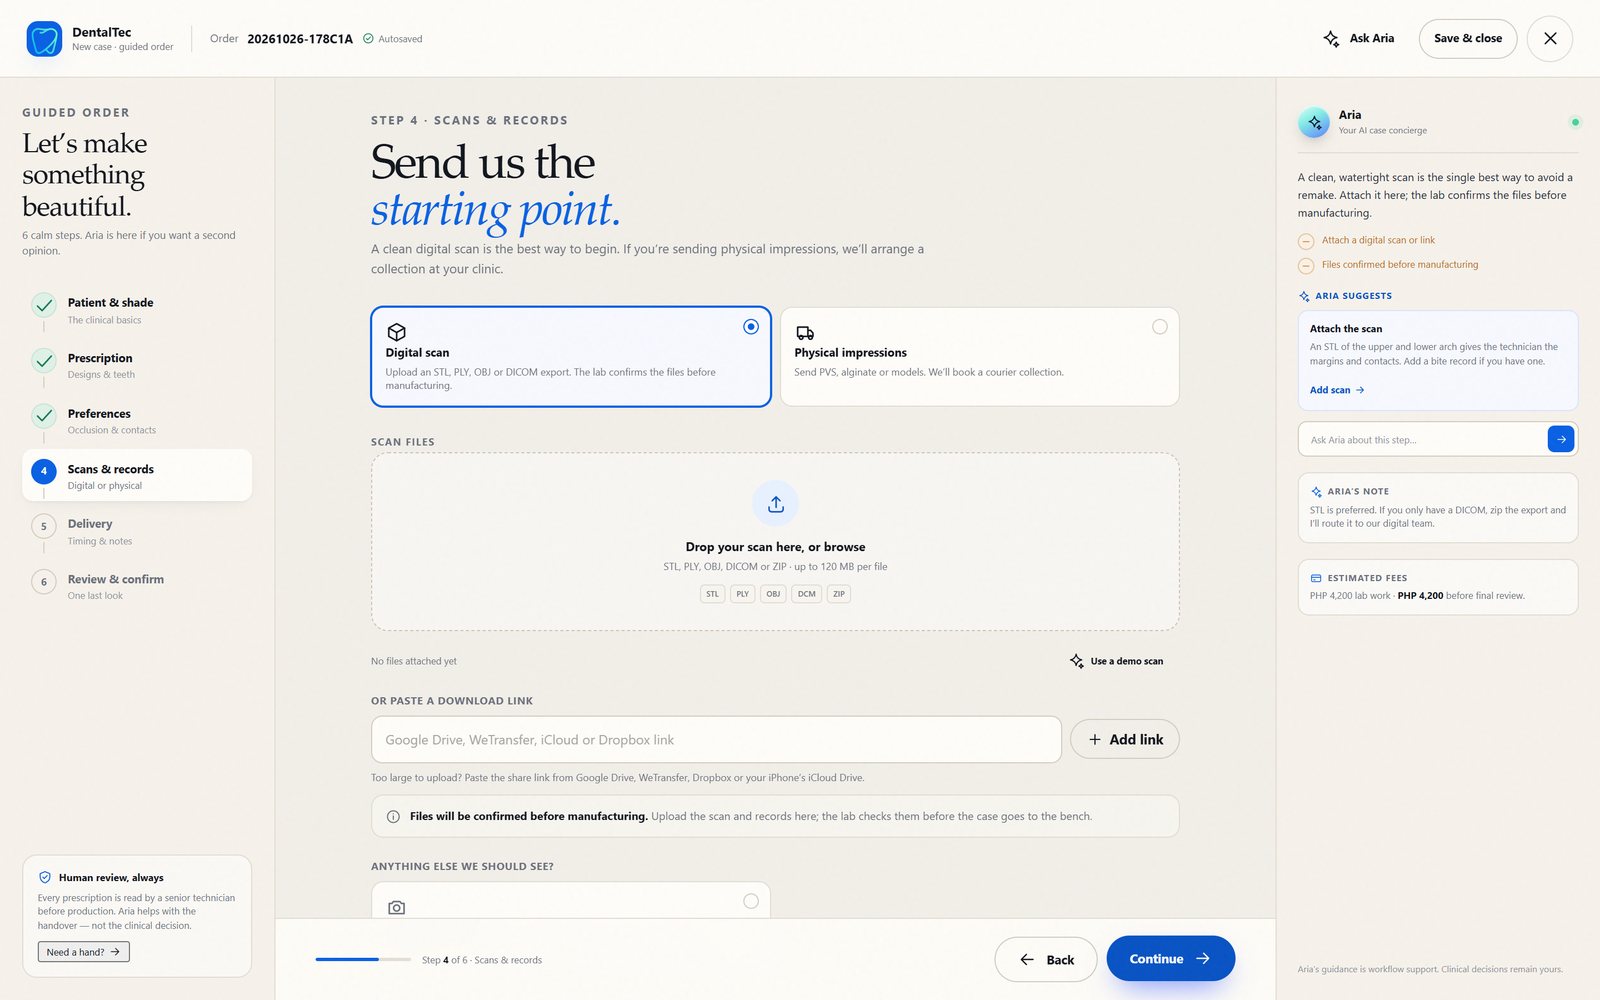
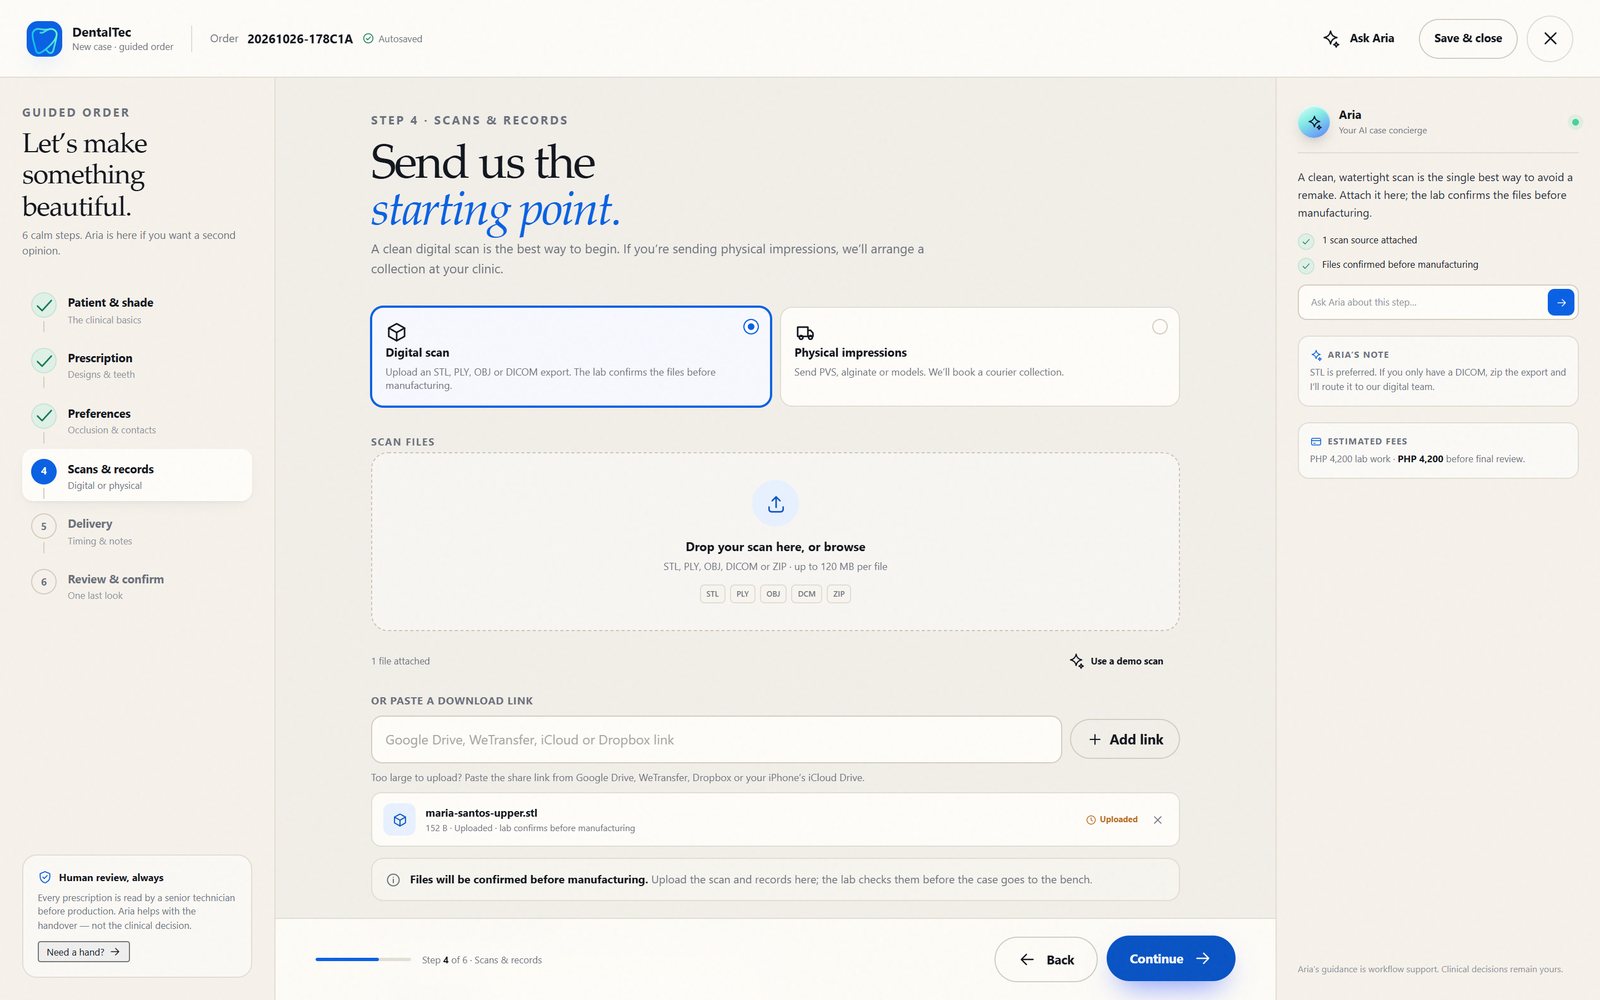
The file attached
STL, PLY, OBJ, DICOM or ZIP — up to 120 MB per file.
- Check the name and size are right.
- Wrong file? Remove it with the cross and add another.
- Add a shade photo if the patient is between shades.
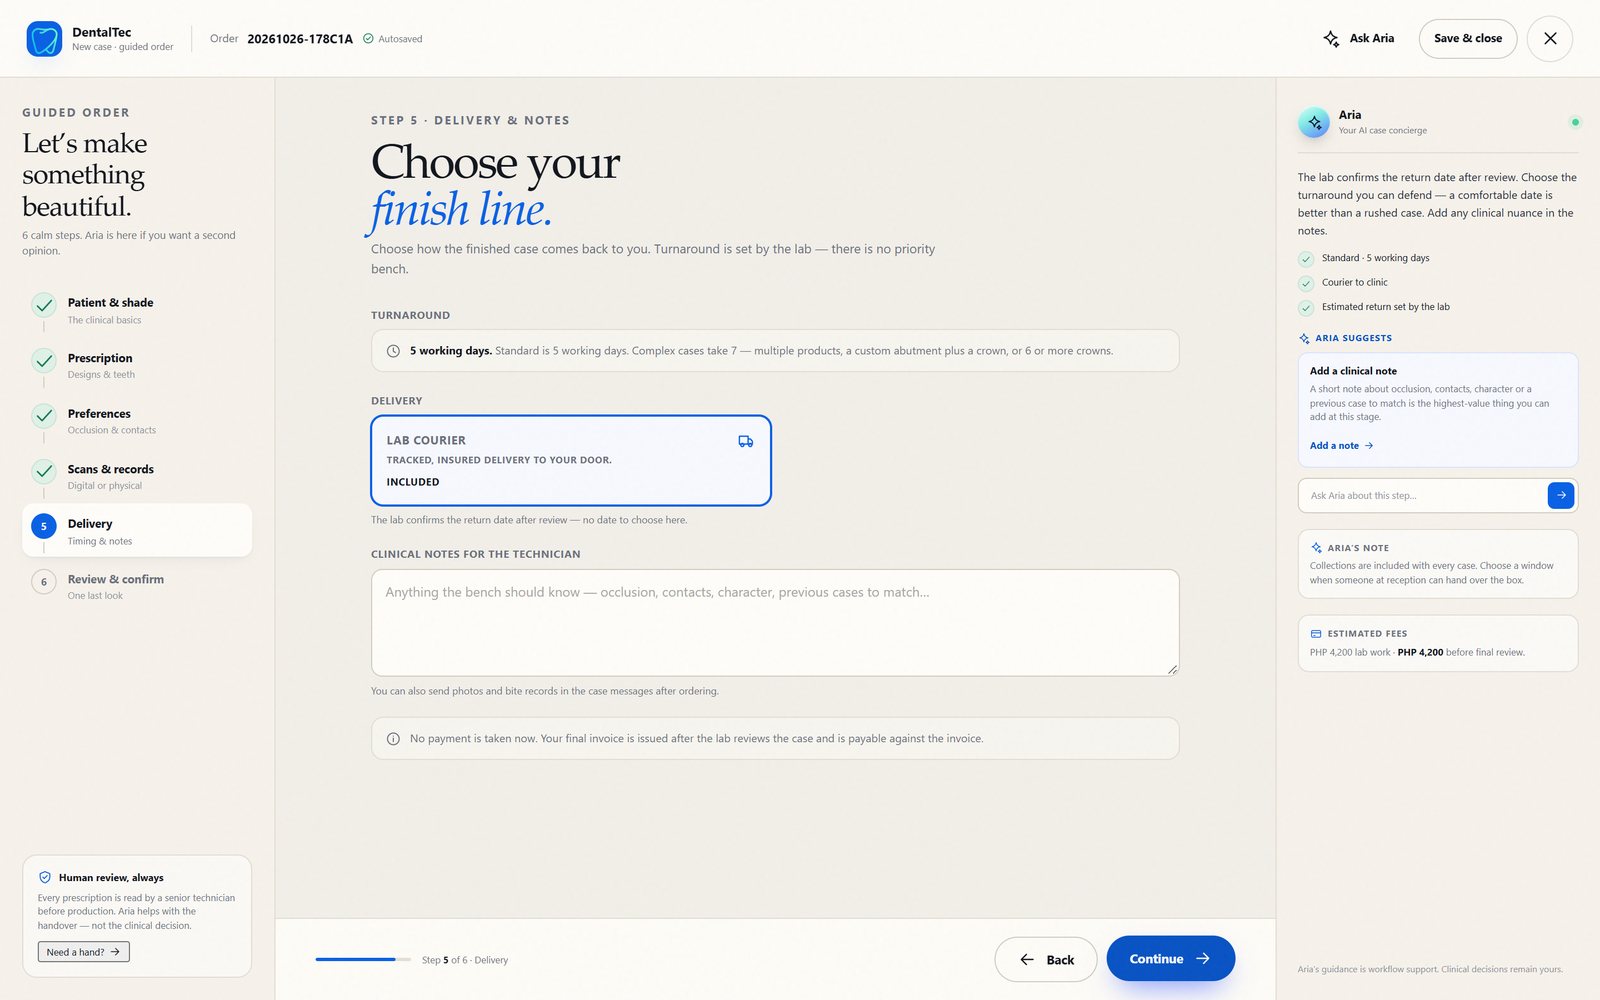
Delivery and notes
How the finished work comes back to you.
- Confirm the delivery method and turnaround.
- Add anything the technician should know.
- Press Continue.
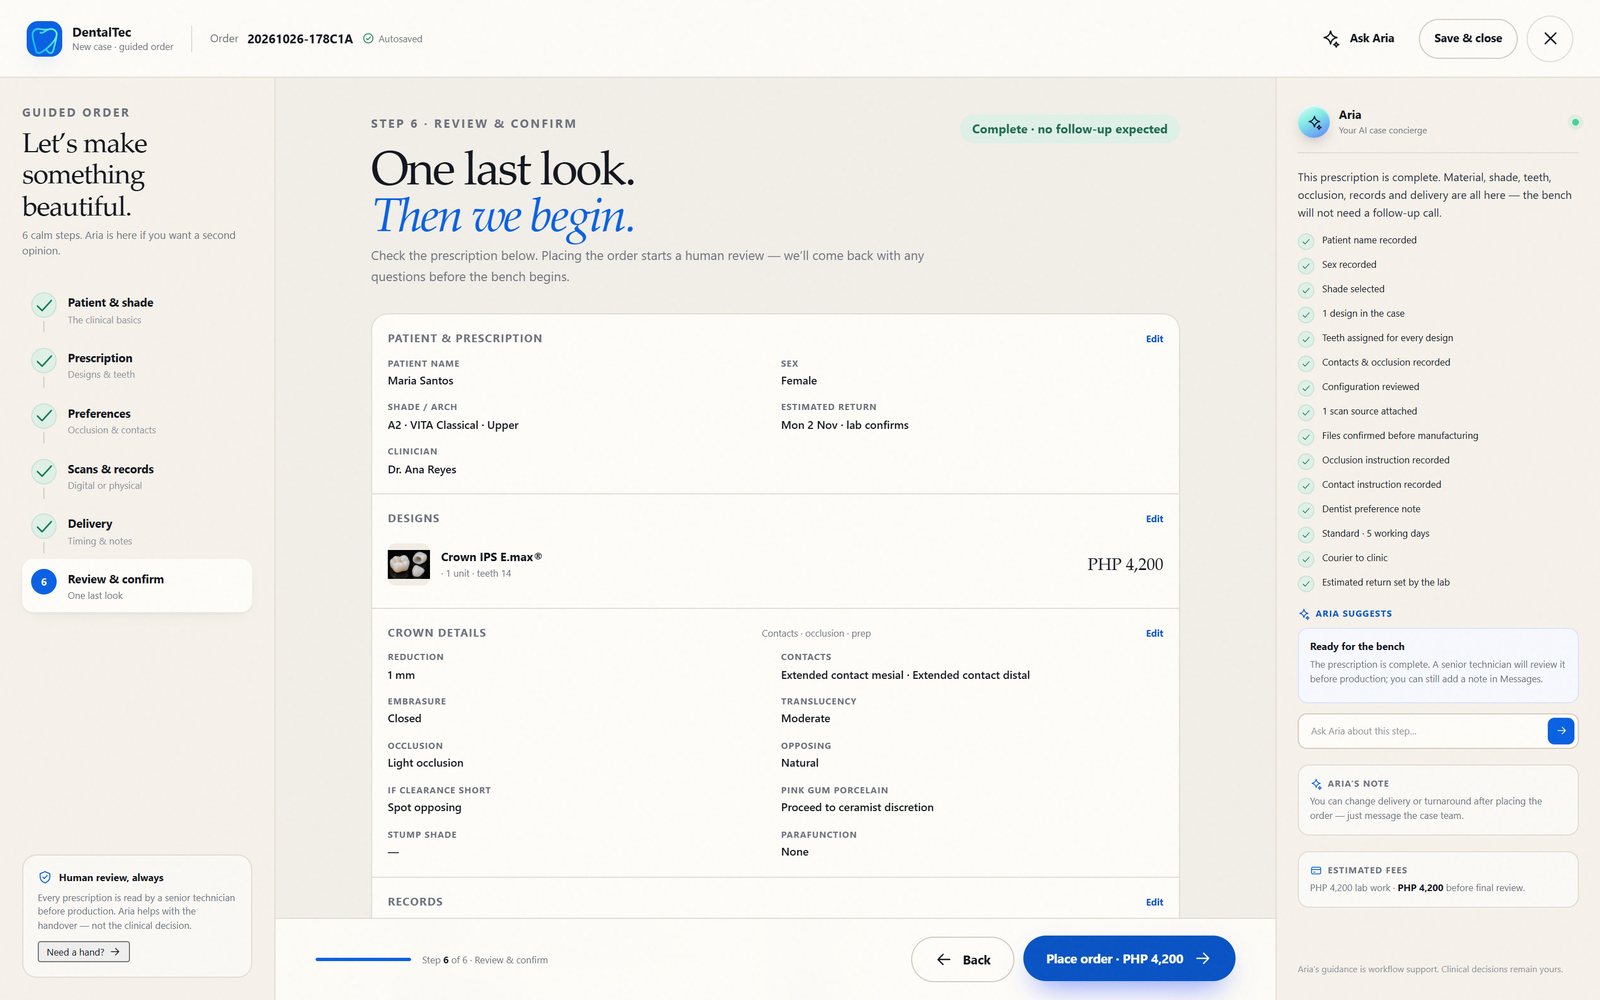
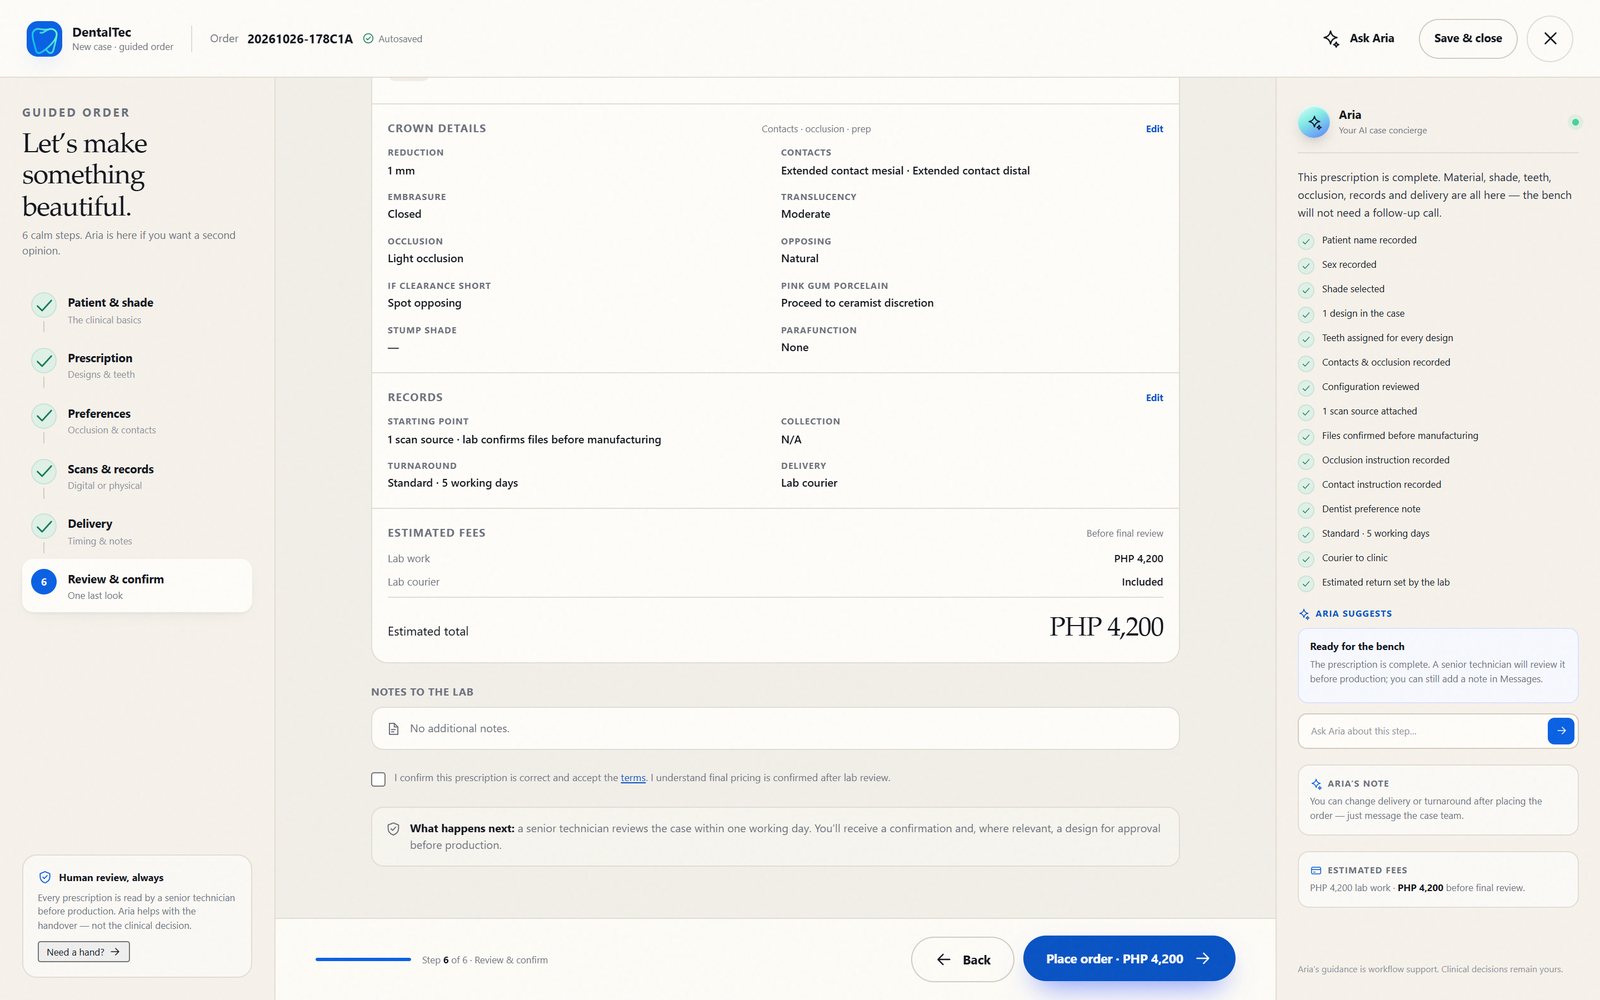
One last look
Everything on one page: patient, shade, design, teeth, price.
- Read down the page.
- Anything wrong? Press Edit on that block and change it.
- Then scroll to the bottom to confirm.
Confirm and place
Two small things at the bottom of the review.
- Tick I confirm this prescription is correct.
- Press Place order.
- Nothing is charged until a technician has reviewed it.
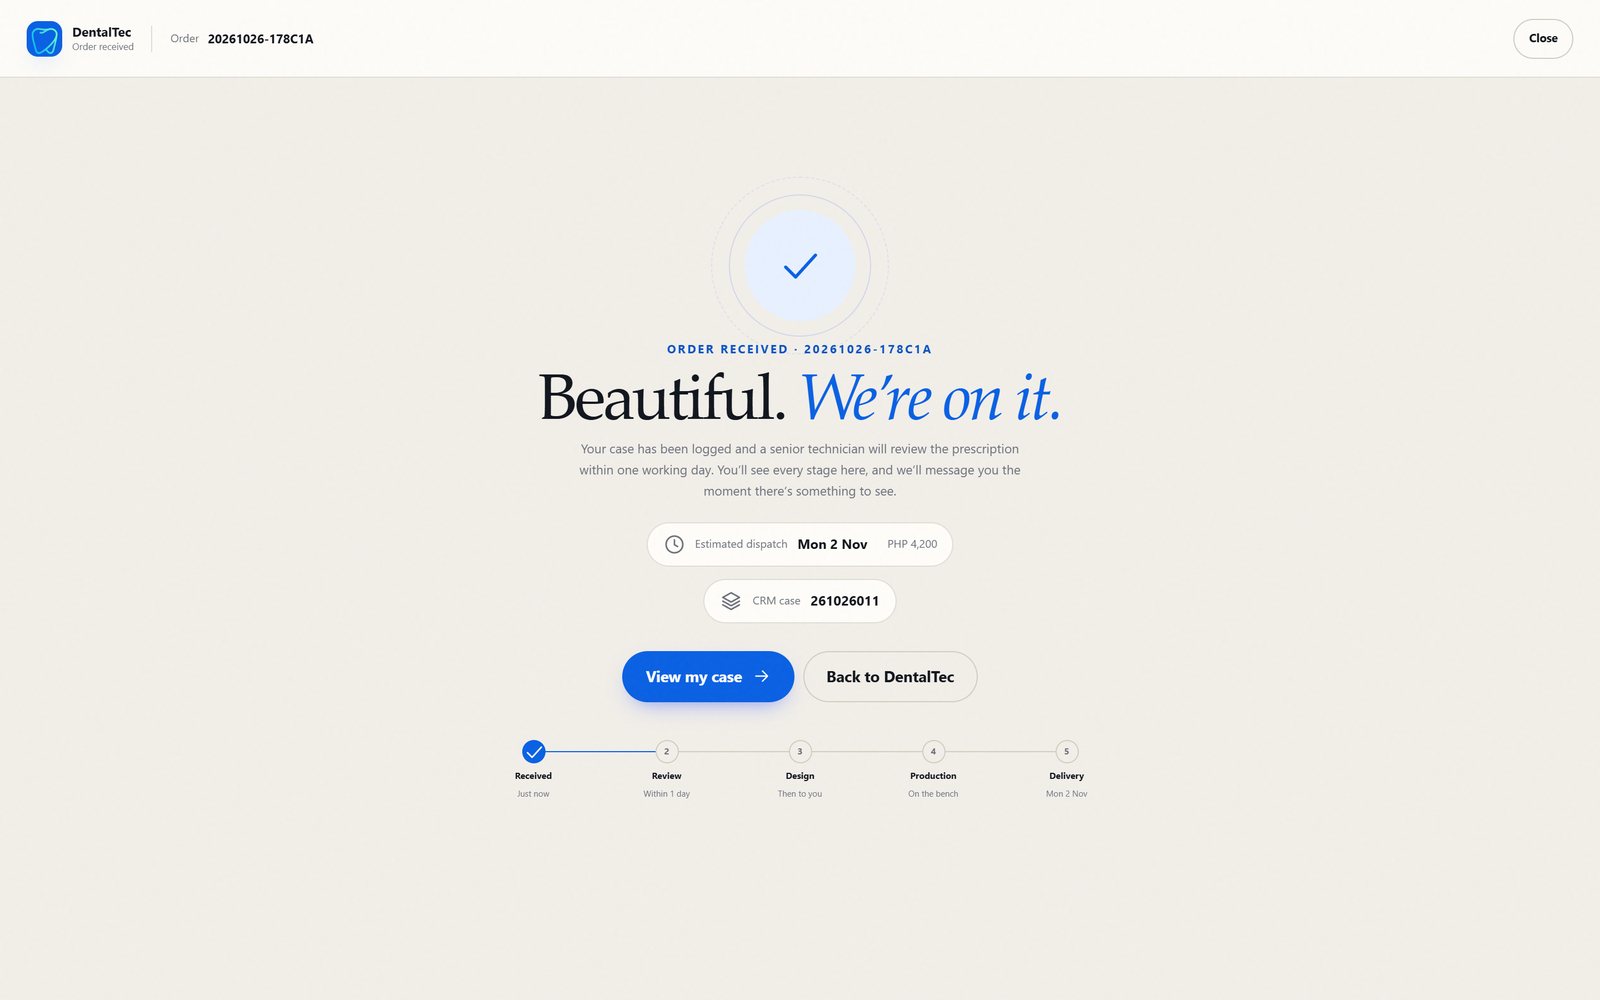
Done — and what happens next
Your order is on our bench the moment you see this screen.
- A senior technician reviews it within one working day.
- Then Received → Review → Design → Production → Delivery.
- We message you when there is something to see.
Before you press place
Print this and keep it by the chair, or tick it on screen.
- ☐Signed in with the clinic email — code entered
- ☐Patient name and sex
- ☐Shade guide, shade and arch
- ☐Design chosen and teeth clicked
- ☐Preferences checked (defaults are fine)
- ☐Scan attached, link pasted, or collection arranged
- ☐Delivery and turnaround
- ☐Confirm box ticked, Place order pressed
If something does not work
The code never arrives
Wait a minute, check spam, then press Resend code. If it still does not come, message the lab.
That file is larger than 120 MB
Upload the scan to Google Drive or WeTransfer and paste the link into the scan step.
I cannot find my scan
The STL Lab tab keeps every scan you have uploaded. You can also add files after ordering.
I clicked the wrong tooth
Press Edit on the design block in the review, or step back with the left-hand menu.
I need to change something after ordering
Message the case team. Nothing is made until we have reviewed it with you.
What is the ₱7,000 credit?
New digital clinics that send a scan through the portal get ₱7,000 in order credits on their account. Tell us you are starting digital when you register and we will apply it.
Still
stuck?
Message us from the portal — Messages, then New message — or call the lab on +63 956 338 4812. A person reads it, and we would rather answer a question before the case starts than after.
Register once, then send the first case.
Approval is usually within one business day. New digital clinics that send a scan get ₱7,000 in order credits, and new accounts can trial the lab with a free zirconia crown.